dxAnalytics User Guide
Introduction
dxAnalytics widget terminal is a comprehensive web tool designed for market data visualization and analysis. Its integration capabilities allow for personalized widget organization, delivering a tailored experience for each client and maximizing efficiency.
dxAnalytics provides access to real-time global trading data, financial news, fundamental data, and dxFeed options analytics, including Greeks and implied volatility.
Getting started
To get started with the terminal:
Log in using credentials provided by the dxFeed team. Upon accessing the website, you will be presented with an empty terminal window.
In the top menu, click the Add Widget button to add any widget of your choice. Each widget is accompanied by a brief description; simply hover over a widget to view its description.
You have the flexibility to add any widgets you require. These widgets can accommodate as much content as needed. However, for your convenience, we recommend not exceeding 4 widgets per workspace.
Read more about working with widgets below.
Appearance settings
You can switch between a dark theme and a light theme by clicking the  icon. By default, the color scheme for dxAnalytics matches the color scheme of the device you're using.
Interaction with workspaces
You can create several workspaces, each dedicated to a different trend or task. Multiple workspaces offer the convenience of tailoring your data organization and creating layouts for future reference. In the top menu, click the  button to add a new workspace in a new tab. This enables you to work with two or more workspaces simultaneously. You can customize each workspace with a unique name.
Predefined workspaces
Instead of setting up a workspace from scratch, you can choose a predefined workspace. Use it as is, or just use it as a base and customize it for yourself.
Workspace import and export
To export your workspace, click the  button and select the Export to file option. To upload any preset workspace in JSON format, click the button and select the Import workspace option.
Note
All your settings will be automatically saved, even if you reload the page. If you wish to reset your settings, you can delete your workspaces or clear your cache. Persistence. After you log out and log back in, your chosen number of workspaces, widget set, symbols, data points, widget arrangement, size, and parameters across a variety of widgets including Watch List, Simple Chart, Exchange Notifications, and Options Charts, and more, will be in the same state in which you configured them.
Widgets Interface
Each widget provides an interface for market data visualization and technical analysis.
Common features
Filters. This allows you to access and apply filters by clicking on the column name. Use unique filters for letter and number columns. You can apply up to three filters simultaneously, one per column.
Sorting. This allows you to sort column data. Click the header, alter the sorting direction with a second click, restore to the default state with a third click, and experience real-time list reordering in the widget. Your chosen sorting will be saved for future dxAnalytics initializations.
Column resize, auto-resize, and reorder. These features let you manually adjust column sizes, apply automatic column resizing for optimal display, and reorder columns to suit your data presentation preferences.
Persistence. After you log out and log back in, your chosen number of workspaces, widget set, symbols, data points, widget arrangement, size, and parameters across a variety of widgets including Watch List, Simple Chart, Exchange Notifications, and Options Charts, will be in the same state in which you configured them.
Color grouping
You can improve widgets’ orchestration by interlinking several widgets. For this:
Matching colors indicate all widgets that are connected with each other. When you change a symbol in one of the widgets in the group, it will automatically update in all connected widgets.
Click
 next to a widget’s name and select a color from the drop-down list.
Select the same color for all widgets that you want to group.
Common settings
Move your cursor over the right corner to display these buttons:
Pin: Click to lock the widget in place, preventing it from moving when you rearrange it. Click it again to unlock the widget.
Fullscreen: Click to make a widget's window take up the entire screen. To return to the main menu, click it again.
Close: Click to remove the widget from the screen.
Layout: Drag the bottom-right corner diagonally up or down to resize the widget window.
Rearranging widgets
To rearrange the widgets, follow these steps:
Hover your cursor over the top part of the widget until a four-arrow icon appears.
Left-click and drag the widget to a new position.
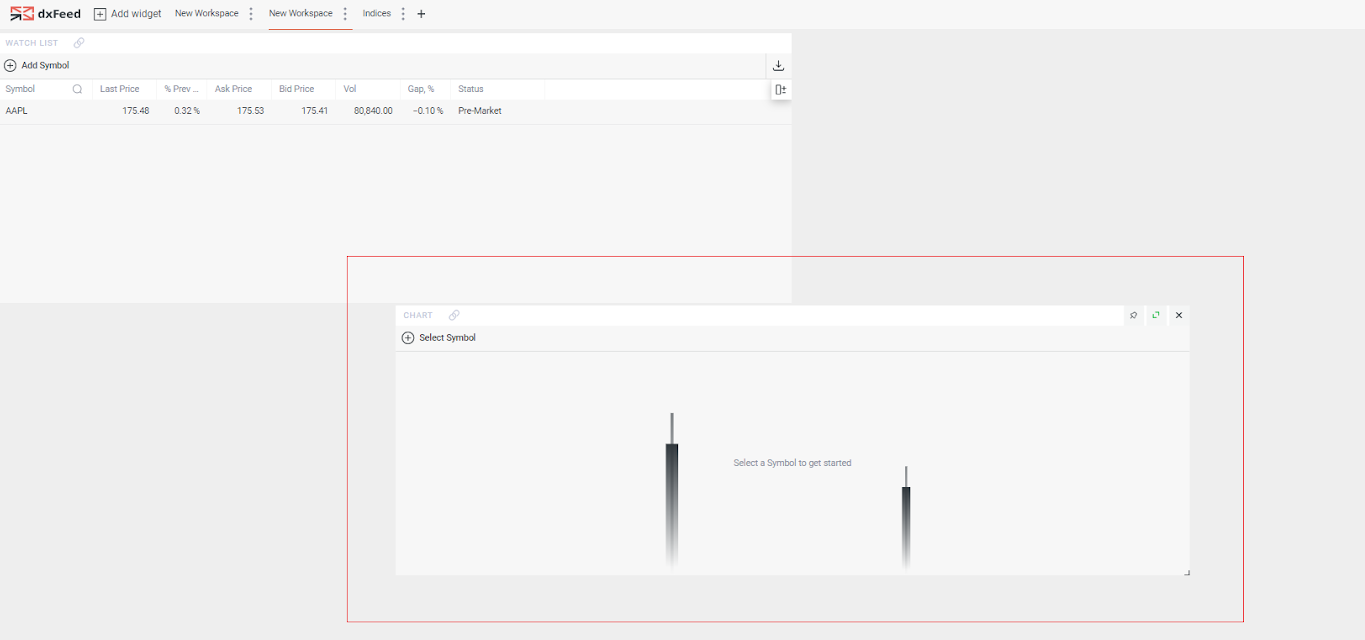
For instance, you can place it in the center, like in the example below.
Core widgets
Сore widgets enable real-time monitoring of specific symbols.
Watch List
The Watch List widget allows you to choose which instruments to monitor. By creating a customized list of instruments, you can make informed trading decisions based on up-to-the-minute information.
To set up the widget:
Click the Add widget button in the menu, and select the Watch List widget from the list.
To add symbols for monitoring:
Click the Select Symbol button.
Start typing in the search bar to see suggestions. Select the desired instrument type for help: stock, index, ETF, product, future, forex, option, or spread.
Add as many symbols as you need.
Customize the displayed data points:
Click the
 button in the top right corner.
Select data points to display.
To remove a symbol from the list, click the X icon that appears when you hover over the symbol.
Note
Click on the CSV export button located in the top right corner to download the entire list.
Chart
The Chart widget allows you to visually explore the market data related to one specific instrument in real-time.
To set up the widget:
Click the Add widget button in the menu and select the Chart widget from the list.
To add symbols for monitoring:
Click the Select Symbol button.
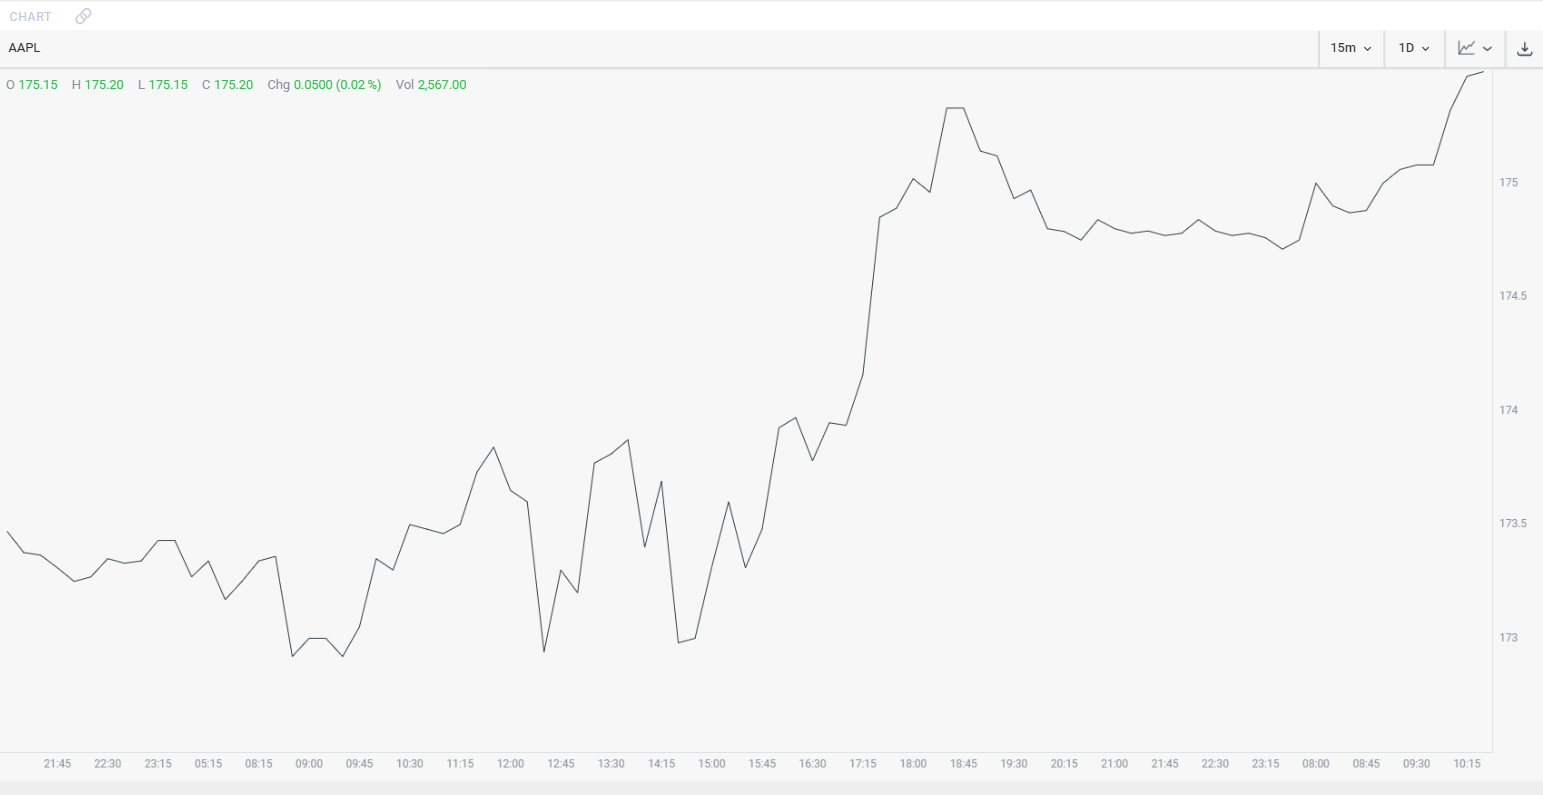
Start typing in the search bar to see suggestions. Select the desired instrument type for help: stock, index, ETF, product, future, forex, or option. You can add only one symbol.
Set the displayed selectors:
A 15-minute aggregation period is displayed by default. To change it, click the 15m text and select which period to display.
A 1-day time period is displayed by default. To change it, click the 1D text and select which period to display.
Line visualization type is displayed by default. To change it, click the
 icon and select which type to display.
Note
Click on the CSV export button located in the top right corner to download the entire list.
Сorporate Card
The Corporate Card widget shows you a set of fundamental data for one specific symbol.
To set up the widget:
Click the Add widget button in the menu and select the Corporate Card widget from the list.
To add symbols for monitoring:
Click the Select Symbol button.
Start typing in the search bar to see suggestions. Note that only stocks are available. You can add only one symbol.
Note
Click on the CSV export button located in the top right corner to download the entire list.
Ticker Panel
With the scrolling Ticker Panel widget, you can see selected instruments and their price shifts at a glance. Choose up to 20 symbols, and get a streamlined overview of their latest prices and price changes.
To set up the widget:
Click the Add widget button in the menu and select the Ticker Panel widget from the list.
To add symbols for monitoring:
Click the Add Symbol button.
Start typing in the search bar to see suggestions. Select the desired instrument type for help: stock, index, ETF, product, future, forex, or option.
Add as many symbols as you need.
Select the Simple View option to exclude graphs.
Time & Sales
The Time & Sales widget allows you to observe ongoing trades. It displays all real-time and historical trades that occur for selected instruments and provides details including date, time, price, and size for each trade.
To set up the widget:
Click the Add widget button in the menu and select the Time & Sales widget from the list.
To add symbols for monitoring:
Click the Select Symbol button.
Start typing in the search bar to see suggestions. Select the desired instrument type for help: stock, index, future, option, or spread. You can add only one symbol.
Set filters for each column. For instance, set Buy or Sell in the Side column.
Trade types:
Green indicates trades that occurred at the ask price.
Red indicates trades that occurred at the bid price.
White indicates trades that occurred inside the bid-ask spread.
Blue indicates trades that occurred outside the bid-ask spread.
Time is displayed with seconds by default. To change to milliseconds, click the Time with Seconds option and select Time with Milliseconds option in the drop-down list.
Only valid symbols are displayed by default. To see all symbols, click the valid text and select the all option from the drop-down list.
Note
Click on the CSV export button located in the top right corner to download the entire list.
Option widgets
Option widgets help you visualize market data for each instrument type. From Greeks and Implied Volatility analytics to real-time options event feeds, Option widgets provide a comprehensive look inside the options market.
Option Chain
The Option Chain widget provides a list of available options contracts for a chosen underlying security. All options contracts are listed by expiration date and option type (standard, special date, etc.). You can select different filters to display 2, 4, 6, 8, 12, or all available strikes, and set up columns to display essential fields and options analytics, such as Greeks, volatilities, and theoretical price for put and call parts of the display.
To set up the widget:
Click the Add widget button in the menu and select the Option Chain widget from the list.
To add symbols for monitoring:
Click the Select Underlying button.
Start typing in the search bar to see suggestions. Select one or more options from the list of instrument types: stock, index, ETF, product, future, and/or forex. You can add only one symbol.
Set the displayed selectors:
All series are displayed by default. To display only one specific period, click the Series option and select a period from the drop-down list.
4 strikes are displayed by default. To select a different number, click the Strikes option and select which number to display from the drop-down list.
Select the Extended option to show Bid, Ask, Open, High, and Low prices.
Customize the displayed data points:
Click the "icon" button in the top right corner.
Select data points to display.
Option Charts and Option Surface
Both of these widgets help you visualize an entire picture of the option underlyings. The Option Charts widget provides a visualization of both the individual options and the dynamic of the whole series, while the Option Surface widget is a 3D version of the Option Charts widget.
To set up the widget:
Click the Add widget button in the menu and select the Option Charts or Option Surface widget from the list.
To add symbols for monitoring:
Click the Select Underlying button.
Start typing in the search bar to see suggestions. Select the desired instrument type for help: stock, index, ETF, or future. You can add only one symbol.
Set the displayed selectors:
Call is displayed by default. To change to put, click the Call text and select the Put option from the drop-down list.
Implied Volatility is displayed by default. To change it, click the Implied Volatility text and select the specific parameter to display.
Expiration date is displayed by default. To change it, click the Expiration Date text and select the specific parameter to display.
Strike is displayed by default. To change to put, click the Strike option and select the specific parameter to display.
Options Time and Sales
The Options Time and Sales widget allows you to see time and sales for all options of the selected underlying. It also shows the calculated Greeks by the time of the Time and Sales.
To set up the widget:
Click the Add widget button in the menu and select the Options Time and Sales widget from the list.
To add symbols for monitoring:
Click the Select Underlying button.
Start typing in the search bar to see suggestions. Select the desired instrument type for help: stock, index, ETF, or future. You can add only one symbol.
Time is displayed with seconds by default. To change to milliseconds, click the Time With Seconds text and select Time With Milliseconds option from the drop-down list.
Only valid symbols are displayed by default. To change to all, click the Valid text and select the All option from the drop-down list.
Trade types:
Green indicates trades that occurred at the ask price.
Red indicates trades that occurred at the bid price.
White indicates trades that occurred inside the bid-ask spread.
Blue indicates trades that occurred outside the bid-ask spread.
Customize the displayed data points:
Click the
button in the top right corner.Select data points to display.
Unusual Options
The Unusual Options widget allows you to screen unusual options activity on the market. You can find stocks and individual options with significant unusual options flows, or search for unusual patterns in the historical data. Unusual options trading patterns can provide insight into what “smart money” is doing, indicating new positions and potentially signaling major moves in the underlying asset.
To set up the widget:
Click the Add widget button in the menu and select the Unusual Options widget from the list.
To add symbols for monitoring:
Click the Add Symbol button.
Start typing in the search bar to see suggestions. Note that only stocks are available.
Add as many symbols as you need.
Volume by Exchange
The Volume by Exchange widget shows the number of calls and puts traded by exchanges during the current or last available trading day. Data in the widget can be represented as a bar chart and a table. As soon as you add the widget to the screen, you will be able to see the data; no additional actions from your side are needed.
To set up the widget:
Click the Add widget button in the menu and select the Volume by Exchange widget from the list.
A list of all symbols is displayed.
The default display is the chart view. To switch to the table view, click the
 button and select the Table option from the drop-down list.
Radar
The Radar widget allows you to track live market behavior, along with searching for new trade ideas. The widget provides a wide range of configuration options and predefined search criteria. It also displays a detailed overview of real-time market data and key fundamental and technical data for each instrument, allowing you to use the widget as a market screener and market scanner at the same time.
To set up the widget:
Click the Add widget button in the menu and select the Radar widget from the list. A list of all symbols is displayed.
Define a candle period from 1m to 1h.
Customize the displayed data points:
Click the
button in the top right corner.Select data points to display.
Note: you can also click the Radar icon to select data point categories, where you can also specify all data points.
Note
Click the CSV export button located in the top right corner to download the entire list.
Refresh the page if needed.
News feed
The News feed widget shows a stream of the latest financial news. Each record contains the title, source, and time of publication. The body of the news message can be opened separately. You can customize the stream by adjusting the widget’s settings to display news for requested symbols, tags, and filter conditions.
To set up the widget:
Click the Add widget button in the menu and select the News Feed widget from the list. All the most recent news for symbols will be displayed.
Click any news item in the list to read the full article.
To show a list of news items for a specific symbol:
Click the Filter Symbol button.
Start typing in the search bar to see suggestions. Select the desired instrument type for help: stock or index. You can add only one symbol.
Refresh the page if needed.
Exchange notifications
With this widget, you can view the underlying that are currently halted on the market and the symbols for which short selling is currently restricted. The widget is meant to be easy to use: it has only two tabs and no selection is required to start.
To set up the widget:
Click the Add widget button in the menu and select the Exchange Notifications widget from the list. A list of all symbols will be displayed.
Set the displayed selectors. Only currently halted notifications are displayed by default. To change to short sale restriction, click the Currently Halted text and select the Short Sale Restriction option from the drop-down list.
Customize the displayed data points. Set filters for each column.
Refresh the page if needed.